Do you want to record incoming calls on your iPhone without using any additional apps? Look no further, as we have the perfect solution for you.
In this article, you will master the built-in method to record calls on your iPhone effortlessly. With just a few simple steps, you’ll be able to access the call recording feature and manage your recorded calls with ease.
First, we will guide you on enabling call recording on your iPhone. Then, we’ll show you how to access the call recording feature and initiate the recording process during your calls. You’ll also learn how to effectively manage and save your recorded calls for future reference.
It’s important to be aware of the legal considerations surrounding call recording, and we’ll provide you with some essential information in that regard. Additionally, we’ll troubleshoot common issues that may arise during the call recording process.
Get ready to become a pro at recording incoming calls on your iPhone without the need for any extra apps. Let’s dive in and master the built-in method together!
Key Takeaways
- The built-in method to record incoming calls on an iPhone involves using the Voice Memos app and the Control Center.
- To enable call recording, users need to add the Voice Memos feature to the Control Center and can start recording calls by tapping on the Voice Memos icon.
- The recorded calls are saved in the Voice Memos app for easy access.
- It is important to be aware of the legal considerations and regulations regarding consent when recording phone conversations to avoid potential legal consequences.
Enabling Call Recording on Your iPhone
To enable call recording on your iPhone, simply follow these steps and you’ll be capturing important conversations in no time.
First, open the Settings app on your iPhone’s home screen.
Scroll down and tap on ‘Control Center’ and then ‘Customize Controls.’
Next, find the ‘Voice Memos’ option in the list and tap the green plus sign next to it to add it to your Control Center.
Now, when you receive a call that you want to record, simply swipe down from the top right corner of your screen to access the Control Center and tap the ‘Voice Memos’ icon.
This will start recording the call, and you can stop the recording by tapping the red button.
The recorded call will be saved in the Voice Memos app on your iPhone for easy access later.
Accessing the Call Recording Feature
Unlock your device and navigate to the settings menu where you’ll find the hidden treasure of call recording. Once you’re in the settings menu, scroll down and tap on ‘Control Center.’ From there, select ‘Customize Controls’ and look for the green plus sign next to ‘Screen Recording.’ Tap on it to add it to your Control Center.
Now, exit the settings menu and swipe down from the top-right corner of your screen to access the Control Center. You’ll see a round button with a dot inside it. Tap and hold on this button until a menu appears. Look for the microphone icon and tap on it to turn on audio recording.
Now, you’re ready to record your incoming calls without having to download any additional apps.
Initiating Call Recording
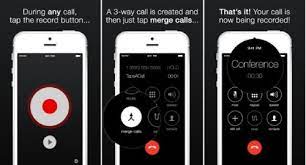
Once you’ve successfully customized your Control Center, it’s time to dive into the exciting world of call recording on your iPhone. To initiate call recording, simply make or receive a phone call as you normally would. During the call, you’ll see a red recording icon at the top of your screen, indicating that the call is being recorded. This ensures that both incoming and outgoing calls are captured.
Keep in mind that call recording is only available in certain regions and may require consent from all parties involved, so be sure to familiarize yourself with the local laws and regulations.
Once the call is completed, the recording will be saved to your iPhone’s Voice Memos app, where you can access and listen to it later. It’s as simple as that!
Managing and Saving Recorded Calls
After successfully initiating call recording on your iPhone, you’ll want to know how to effectively manage and save your recorded calls for future reference. Luckily, the built-in method makes this a breeze.
Once you’ve finished a call and the recording has stopped, you’ll find the recorded audio file in the ‘Voicemail’ section of your Phone app. Simply tap on the ‘Voicemail’ tab and scroll down to find the recorded call.
From there, you have the option to listen to the recording, share it via email or messaging apps, or save it to your device. To save the recording, tap on the share button and select the ‘Save to Files’ option. This will allow you to choose a location on your iPhone to save the file, making it easily accessible whenever you need it.
Legal Considerations for Call Recording
Be aware of the legal implications when it comes to recording your phone conversations on your iPhone, as it’s crucial to understand the potential consequences and ensure that you’re complying with the relevant laws and regulations.
Recording calls without the consent of all parties involved may be illegal in certain jurisdictions, so it’s important to familiarize yourself with the laws in your country or state. In some places, both parties need to give their consent before a call can be recorded, while in others, only one party needs to be aware of the recording.
Failure to comply with these laws can result in legal consequences, including fines or even criminal charges. Therefore, it’s essential to research and understand the legal requirements before recording any phone calls on your iPhone.
Troubleshooting Common Issues
To effectively tackle common issues that may arise during phone conversations, it’s important to have a thorough understanding of troubleshooting techniques. If you encounter any problems while using the built-in method to record incoming calls on your iPhone, there are a few steps you can take to resolve them.
First, ensure that you have the latest iOS version installed on your device, as updates often include bug fixes.
Additionally, check if the call recording feature is enabled in your settings. If it’s not, simply go to the Phone settings, tap on Calls, and toggle the ‘Incoming Calls’ option to enable call recording.
If the issue persists, try restarting your iPhone and disabling any third-party apps that may interfere with call recording.
Frequently Asked Questions
Yes, you can record calls on your iPhone without using any third-party apps. Simply go to your iPhone’s settings, tap on Control Center, customize controls, and add the “Screen Recording” option. Then, during a call, swipe up from the bottom and tap the screen recording icon to start recording.
Yes, call recording is available on all iPhone models and iOS versions. You can easily record incoming calls without using any third-party apps by following the built-in method provided by Apple.
To access the call recording feature on your iPhone, go to the Settings app and tap on “Control Center.” Then, customize your Control Center and add the “Record Screen” option. From there, you can easily start recording incoming calls.
Yes, you can record both incoming and outgoing calls using the built-in method on your iPhone. It allows you to easily capture important conversations without the need for any additional apps.
Yes, there are legal considerations and restrictions for recording calls on an iPhone. It is important to check your local laws and obtain consent from all parties involved before recording any calls.
Conclusion
So there you have it – now you know how to record incoming calls on your iPhone without the need for any additional apps. By following the built-in method, you can easily enable call recording, access the feature during a call, manage and save your recorded calls, and be aware of the legal considerations surrounding call recording.
Remember to troubleshoot any common issues that may arise, and you’ll be able to confidently record and save important phone conversations on your iPhone.